
Disclosure: This post contains affiliate links. If you purchase through these links, we may earn a commission at no additional cost to you.
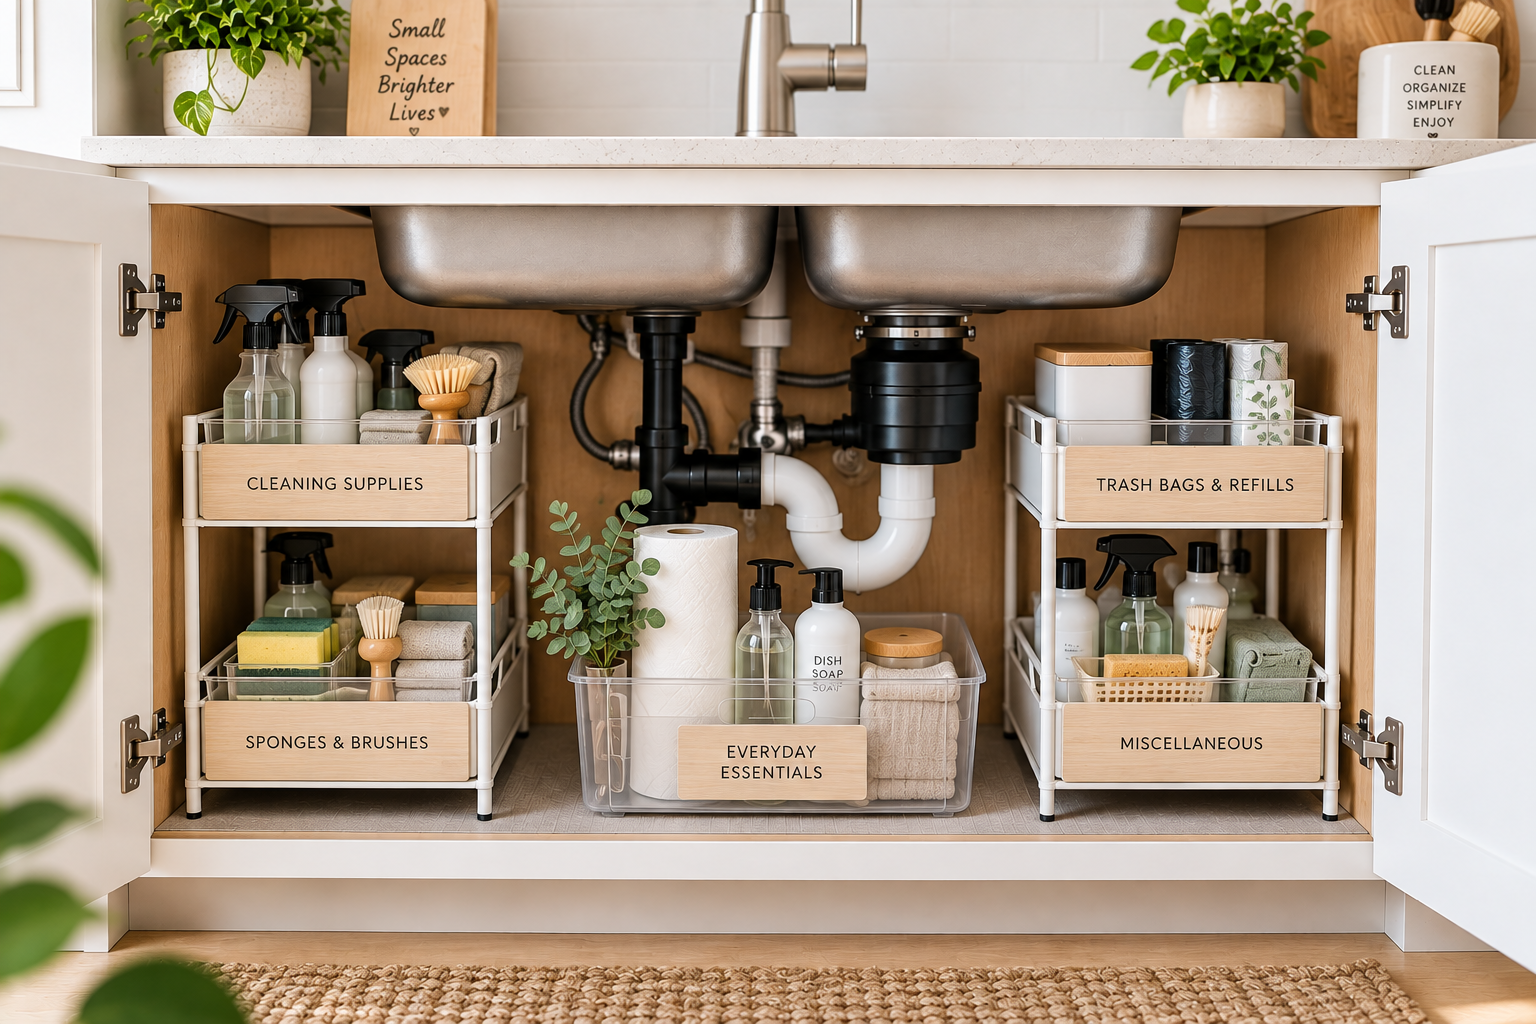
The cabinet under the kitchen sink is one of the easiest places for clutter to build up—especially in a small kitchen. Pipes, drains, and other plumbing take up valuable space, while cleaning supplies, sponges, trash bags, and everyday essentials compete for what is left.
The solution isn’t simply to fit more things into the cabinet. A better approach is to decide what actually belongs there, measure the usable space, and choose storage that works around the plumbing instead of fighting against it.
In this guide, we’ll walk through how to organize under the kitchen sink step by step, including how to use vertical space, create practical storage zones, protect the cabinet from leaks, and choose organizers that make sense for a small kitchen.
Table of Contents
Why Under-Sink Cabinets Get Cluttered So Quickly
Under-sink cabinets are awkward storage spaces because much of the interior isn’t truly usable. The sink bowl extends down from above, plumbing pipes interrupt the middle of the cabinet, and some kitchens may also have a garbage disposal or water-filtration components taking up additional room. This makes standard shelves and storage containers difficult to fit.
Clutter usually gets worse when products are placed wherever there happens to be an empty spot. Bottles disappear behind pipes, smaller items get pushed to the back, and buying an organizer without measuring first can actually waste more space. The goal is therefore not to fill every inch, but to create a simple system where the items you need are visible and easy to reach.
Step 1: Empty the Cabinet and Decide What Actually Belongs There
Start by taking everything out of the cabinet. An empty space makes it much easier to see how much usable room you actually have and whether there are any leaks, stains, or damaged areas that need attention before you reorganize.
Next, sort the items you removed. Keep frequently used kitchen-related supplies together, move products that belong elsewhere to a more appropriate location, and discard empty containers or items you no longer use. Avoid keeping something under the sink simply because that is where it has always been stored.
In a small kitchen, every storage area needs a clear purpose. Keeping fewer, genuinely useful items under the sink gives you more flexibility when you start creating storage zones and choosing organizers later.
Step 2: Measure Around Pipes, Disposals, and Other Obstacles
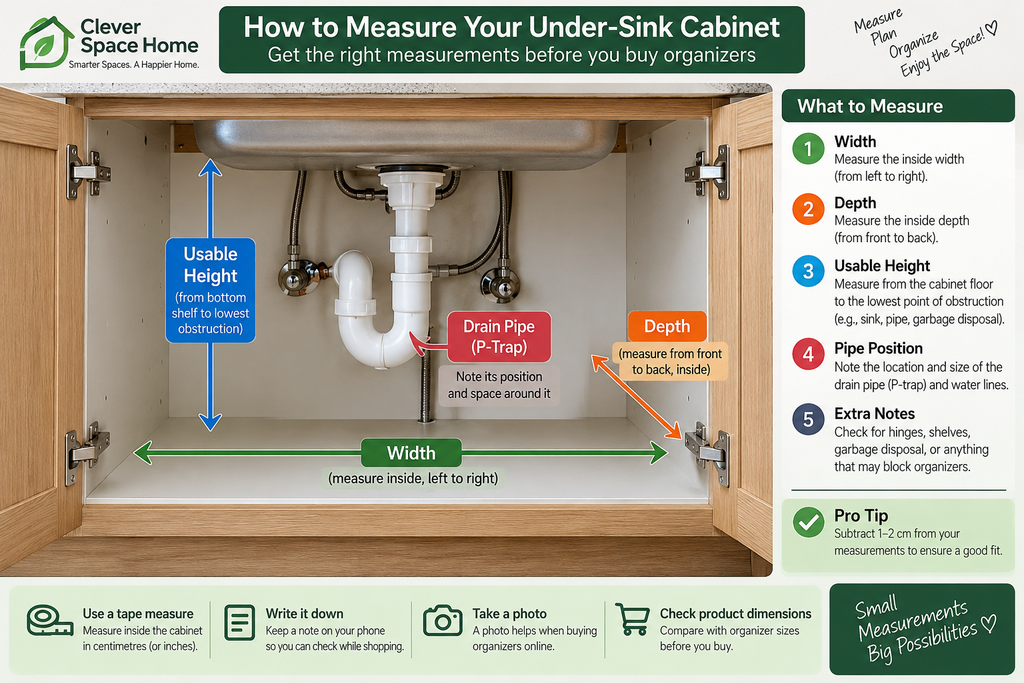
Before buying any organizer, measure the cabinet’s usable space rather than relying only on its overall width and height. Measure the interior width, depth, and height, then note exactly where pipes, valves, the sink bowl, garbage disposal, or filtration equipment reduce that space.
Pay particular attention to the height available on each side of the plumbing. An organizer that fits perfectly on one side may be too tall or too deep on the other. Also make sure that storage does not prevent access to shutoff valves or plumbing connections that may need maintenance.
Keep these measurements with you when comparing organizers. A product can have excellent reviews and still be a poor choice if its dimensions or drawer movement conflict with your particular plumbing layout.
Step 3: Create Simple Storage Zones
Once you know what will stay under the sink, divide the cabinet into simple storage zones based on how often you use each item. For example, everyday dishwashing and cleaning supplies can stay toward the front, while refills and less frequently used items can go farther back.
Keep similar items together instead of spreading them throughout the cabinet. A small caddy can hold frequently used cleaning supplies, while separate bins can contain items such as sponges, dishwasher supplies, or trash bags. This makes it easier to find what you need without pulling everything out.
Avoid creating too many categories. In a small cabinet, a few clear zones are usually more practical than several tiny storage sections. The system should be simple enough that items naturally return to the same place after use.
If you’re organizing the rest of your kitchen at the same time, our guide on how to organize kitchen cabinets in a small kitchen explains how to create practical cabinet zones, use vertical space, and make deep or awkward cabinets easier to access.
Step 4: Use Vertical Space Without Blocking the Plumbing
Under-sink cabinets often have unused vertical space, so adding a second storage level can make a noticeable difference. Two-tier organizers, stackable bins, or compact shelving can help you use that height without simply piling products on top of one another.
The important part is to work around the plumbing rather than trying to fill the entire cabinet with one large organizer. In some cabinets, two smaller organizers placed on either side of the pipes may use the available space better than a single full-width unit.
Leave enough clearance around pipes, shutoff valves, and other plumbing components so they remain visible and accessible. Before choosing a two-tier or pull-out organizer, check not only its overall dimensions but also whether shelves, drawers, or handles can move freely without hitting the plumbing or cabinet doors.
Product option: An adjustable two-tier pull-out organizer like the PYRACK Under Sink Organizer can be useful when you want easier access to items stored toward the back while still making use of vertical cabinet space. Measure your cabinet and plumbing clearance carefully before choosing a size.
Check the PYRACK Under Sink Organizer on Amazon → (paid link)
Step 5: Make Frequently Used Items Easy to Reach
The best storage system is not necessarily the one that holds the most items. In a small under-sink cabinet, accessibility matters just as much as capacity. Products you use regularly should be easy to reach without moving several other items first.
Pull-out organizers can make deeper cabinets easier to use because they bring items at the back toward you. Handled caddies are another practical option for supplies you frequently use together, since the entire group can be removed and returned to the cabinet at once.
Keep less frequently used refills toward the back or in a secondary storage area, while everyday items stay near the front. Whatever system you choose, make sure drawers, baskets, and caddies can be removed easily without hitting pipes or cabinet doors.
Step 6: Protect the Cabinet From Leaks and Spills
Because plumbing runs through the cabinet, the area under the kitchen sink is more vulnerable to moisture, small leaks, and spills than many other storage spaces. Before organizing it, check around the pipes and cabinet base for signs of moisture or existing damage. If you discover an active leak, have the source addressed before installing organizers or covering the cabinet base.
A waterproof or water-resistant under-sink mat or shallow tray can help contain minor drips and product spills while making the cabinet base easier to clean. Choose one that fits around the plumbing and can be removed without dismantling your entire storage setup.
It is also worth checking the cabinet periodically rather than allowing organizers to hide the plumbing completely. Catching moisture early can help prevent a small problem from becoming more serious.
Best Types of Organizers for a Small Under-Sink Cabinet
There is no single under-sink organizer that works for every kitchen. The best choice depends on your usable cabinet dimensions, plumbing layout, and how you want to access the items you store. Instead of choosing an organizer based only on ratings or capacity, match the organizer style to the space you actually have.
L-Shaped Two-Tier Organizers
An L-shaped organizer can work well when pipes or a garbage disposal occupy part of the upper cabinet space. The offset upper tier leaves more room for plumbing while the lower level uses otherwise wasted vertical space. If the lower section pulls out, check that its entire travel path remains clear.
Expandable Under-Sink Shelves
Expandable shelving can be useful when plumbing runs through the middle of a wider cabinet. Designs with adjustable or removable shelf sections provide more flexibility around pipes than a fixed rectangular shelf. The trade-off is that items at the back may still be less convenient to reach than with a pull-out system.
Pull-Out Caddies and Bins
A narrow pull-out caddy can be a practical choice when you have a clear strip of space beside the plumbing. It brings supplies stored toward the back of a deep cabinet forward, making frequently used bottles easier to reach. Measure the full depth and make sure the cabinet opening, hinges, pipes, or floor lip will not interfere with the pull-out movement.
Removable Caddies and Small Bins
Simple removable caddies and bins are often enough for smaller collections of supplies. They are inexpensive, easy to rearrange, and allow you to remove an entire group of related items at once. In a very tight cabinet, several small containers may use awkward spaces more efficiently than one large organizer.
Which Organizer Type Should You Choose?
If plumbing takes up one side of the cabinet, an L-shaped organizer may make better use of the remaining vertical space. For pipes running through the middle, an expandable shelf can offer more flexibility. If your main problem is reaching items at the back of a deep cabinet, a pull-out organizer may be more useful. For very small or irregular spaces, simple removable caddies and bins can often be arranged more easily than a larger fixed system.
What Not to Store Under the Kitchen Sink
Not everything that fits under the kitchen sink belongs there. Because this cabinet contains plumbing and can be exposed to moisture or leaks, it is better to reserve the space for items that can tolerate that environment and that make sense to keep near the sink.
Avoid storing food, paper products, or other moisture-sensitive items in this cabinet. If you have children or pets in the home, cleaning products and other potentially hazardous household substances should be stored according to their label instructions and kept securely out of reach; in some homes, that may mean choosing a different storage location altogether.
Also avoid packing the cabinet so tightly that plumbing connections and shutoff valves become inaccessible. Leaving some open space makes it easier to notice leaks, reach plumbing when necessary, and remove stored items without emptying the entire cabinet.
How to Organize Under the Kitchen Sink and Keep It That Way
An under-sink cabinet is easier to maintain when every group of items has a consistent place. After using something, return it to the same caddy, bin, or storage zone instead of placing it wherever there happens to be room.
Periodically, take a quick look through the cabinet. Remove empty containers, wipe up spills, check for moisture around the plumbing, and move unnecessary items elsewhere. You do not need to completely reorganize the cabinet each time—a short routine check can prevent clutter from building up again.
If the system repeatedly becomes messy, treat that as a sign that the setup needs adjusting. You may have too many items stored there, an organizer may be difficult to access, or frequently used products may simply be in the wrong position. A good organization system should be easy to maintain, not just look tidy immediately after you create it.
Final Thoughts
Learning how to organize under the kitchen sink is less about fitting in as much as possible and more about making awkward space work efficiently. Start by removing what does not belong, measure carefully around the plumbing, create a few practical storage zones, and use organizers only where they genuinely improve access.
In a small kitchen, even modest changes can make everyday storage easier to manage. Choose a setup that fits your particular cabinet rather than copying someone else’s arrangement, and keep enough flexibility to adjust the system as your storage needs change.
5 thoughts on “How to Organize Under the Kitchen Sink in a Small Kitchen”
Comments are closed.