
Disclosure: This post contains affiliate links. If you purchase through these links, we may earn a commission at no additional cost to you.
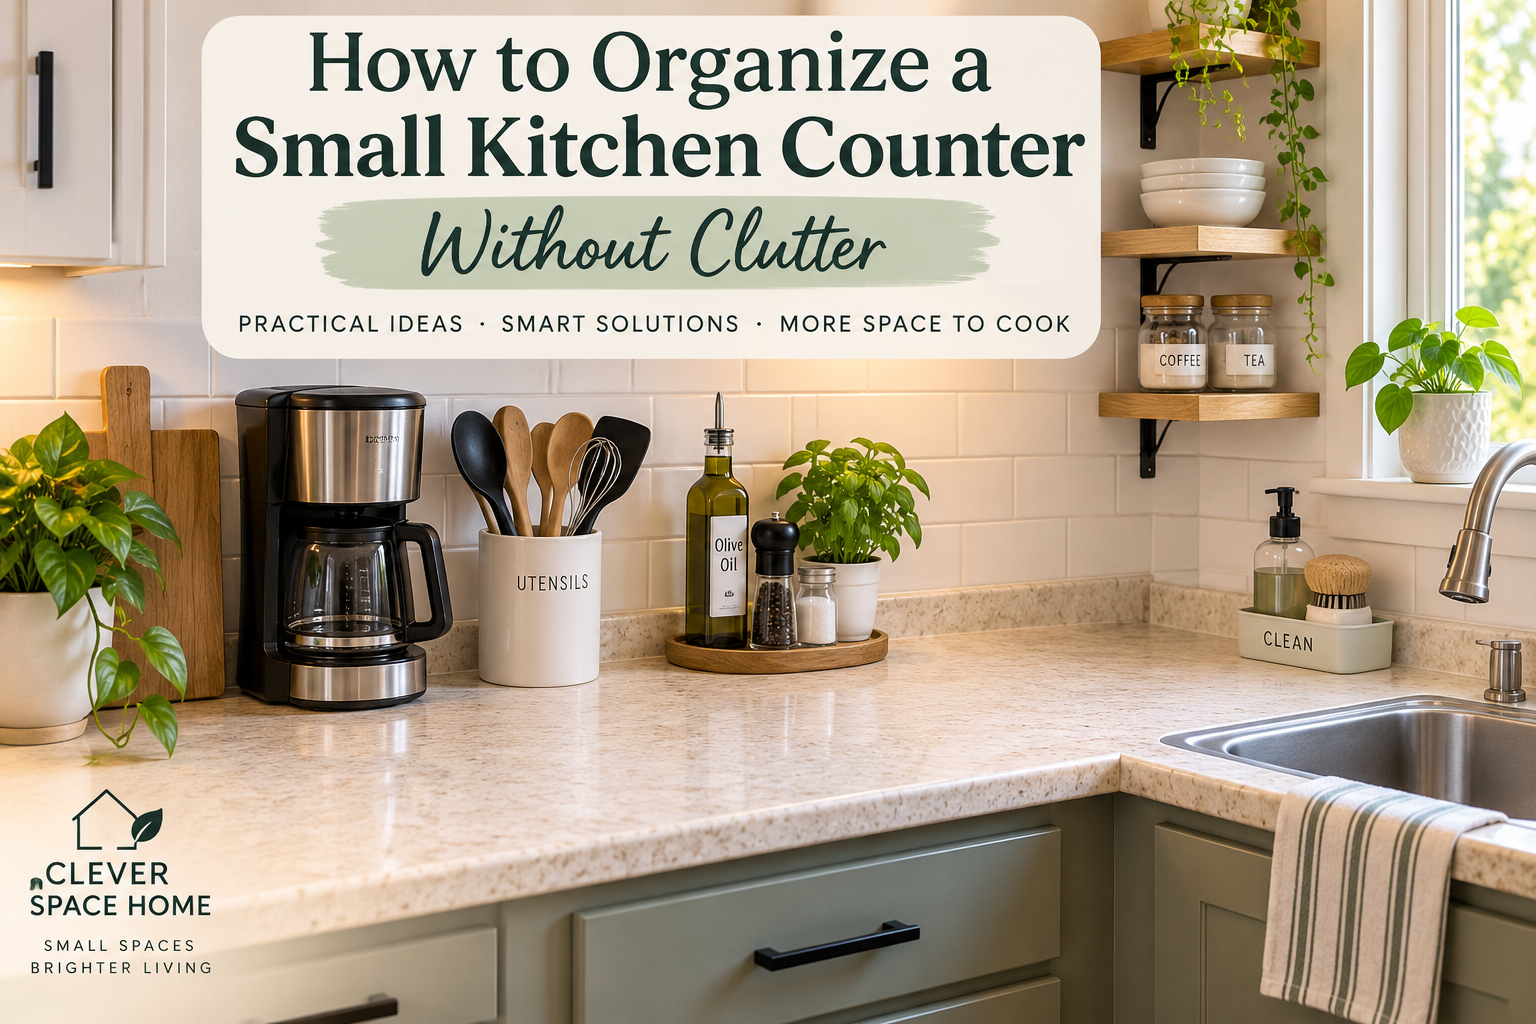
A small kitchen counter can become crowded surprisingly quickly. A coffee maker, toaster, utensil holder, dish rack, cooking oils, fruit bowl, paper towels, and a few unopened groceries may each seem reasonable on their own, but together they can leave very little room for preparing meals.
The solution is not necessarily to remove everything from sight. A practical kitchen still needs frequently used items within easy reach. The goal is to decide what genuinely deserves countertop space and organize those items so that the counter remains functional, easy to clean, and visually calmer.
In this guide, we’ll explain how to organize a small kitchen counter by protecting your most useful work areas, relocating unnecessary items, creating simple activity zones, using vertical space carefully, and choosing organizers only when they solve a real problem.
Table of Contents
Why Small Kitchen Counters Become Cluttered So Quickly
Counter space often becomes default storage because it is convenient. When an item does not have an obvious home in a cabinet or drawer, the easiest option is to leave it on the counter.
The problem becomes more noticeable in a small kitchen because storage and preparation space are already limited. An appliance that takes up a modest amount of space in a large kitchen may occupy a significant portion of the usable counter in a smaller one.
Countertop clutter can also build gradually. One appliance becomes two, a few frequently used ingredients remain beside the stove, mail or shopping bags appear temporarily, and before long the counter is being used more for storage than for food preparation.
A better approach is to treat countertop space as valuable working space rather than simply another storage surface.
Step 1: Clear the Counter Before Deciding What Stays
Start by removing as much as practical from the counter. This gives you an opportunity to see the actual amount of usable space and makes it easier to decide what deserves to return.
Group the removed items into broad categories such as appliances, cooking tools, food, cleaning supplies, paperwork, and miscellaneous household items.
Anything that clearly belongs somewhere else should leave the kitchen counter first. Mail, receipts, keys, medicine, tools, shopping bags, and unrelated household items can consume useful kitchen space simply because they were placed there temporarily and never moved.
Next, look at the kitchen-specific items. Ask how frequently each one is used and whether keeping it permanently visible genuinely makes everyday cooking easier.
The objective is not to create an empty showroom-style counter. It is to establish a useful starting point before rebuilding the space intentionally.
Step 2: Protect Your Main Food-Preparation Area
Before returning appliances and organizers, identify the section of counter you naturally use for chopping, mixing, assembling meals, or setting down ingredients.
Try to keep this area substantially open. Keeping food-preparation surfaces easy to clean is also important, as USDA food-safety guidance recommends washing countertops and other preparation surfaces after food preparation.
In a very small kitchen, protecting even one reliable preparation zone can make a noticeable difference. If every section of the counter contains permanent storage, preparing a meal may require moving several objects before you can begin.
Avoid placing decorative storage in your best work area simply because it fits there. The most convenient section of counter should generally be reserved for activities you perform regularly.
Also consider nearby cabinet doors, drawers, the sink, and major appliances. Countertop storage should not interfere with opening doors or drawers or make normal kitchen movements awkward.
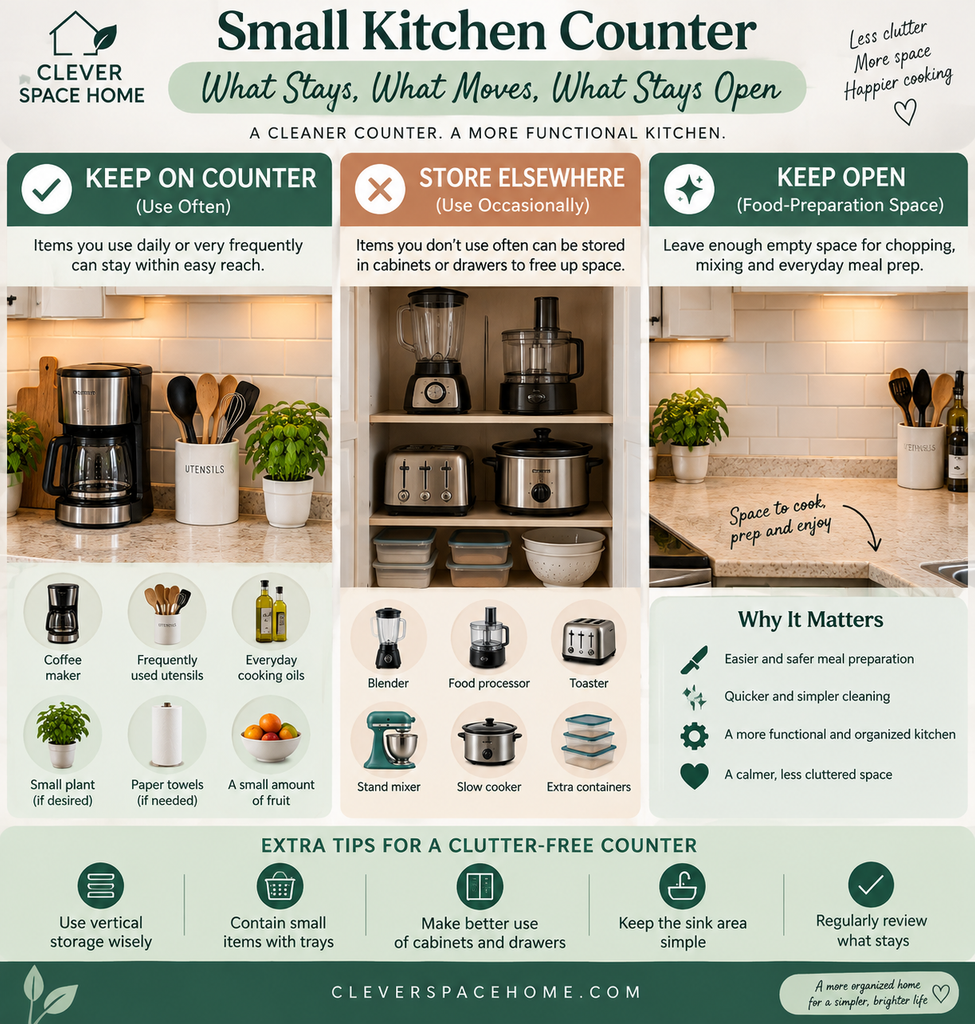
Step 3: Decide Which Appliances Deserve Permanent Counter Space
Small appliances are often among the largest objects kept on kitchen counters, so they deserve particular attention.
An appliance used every day may reasonably stay out. A coffee maker used every morning, for example, may be more convenient on the counter than being repeatedly lifted in and out of a cabinet.
An appliance used only occasionally is different. If a blender, mixer, food processor, slow cooker, or other appliance is used infrequently and you have a suitable alternative storage location, moving it off the counter can immediately recover valuable workspace.
Consider both frequency and effort. A heavy appliance that is used several times a week may be impractical to move constantly, while a lightweight appliance used once a month may be easy to store elsewhere.
Do not keep an appliance permanently on the counter solely because you own it. Counter space should reflect how you actually use your kitchen.
Step 4: Create Small Countertop Zones
Once you know what genuinely needs to remain visible, group related items according to the activity they support.
For example, a coffee area might contain the coffee maker and a small number of frequently used supplies. A cooking zone near the stove might contain a limited selection of everyday utensils or appropriate cooking ingredients. A sink area might hold only the dishwashing items used regularly.
Keeping related items together can make the counter feel more intentional and reduce the tendency for objects to spread across the entire surface.
Keep these zones compact. A coffee station that gradually expands to include every mug, packet, jar, and accessory can become another source of clutter.
The purpose of a zone is to support an activity while using as little permanent counter space as reasonably possible.
Step 5: Move Food Off the Counter Where Practical
Food packaging can quickly make a small counter look crowded. Bread, cereal, snacks, fruit, spices, cooking ingredients, and newly purchased groceries may gradually occupy areas that would otherwise be available for preparation.
Whenever practical, give shelf-stable food a designated cabinet or other suitable food-storage area rather than allowing the counter to become an informal pantry.
If your kitchen does not have a dedicated pantry, our guide on how to organize a small kitchen without a pantry explains how to create a practical food-storage system using cabinets and other available areas.
Some foods may reasonably remain on the counter depending on the product, household habits, and appropriate storage requirements. The important point is to make this an intentional decision rather than allowing food to accumulate wherever space happens to be available.
Always follow the storage instructions provided for individual foods.
Step 6: Use Vertical Space Carefully
When countertop width is limited, vertical storage can sometimes help organize frequently used items without spreading them across a larger area.
A compact tiered shelf, suitable wall-mounted storage, or another vertical organizer may make better use of the space above a small section of counter.
However, vertical storage is only useful when it remains accessible and does not make the workspace feel cramped. Adding several levels of bottles, containers, or kitchen tools can simply move clutter upward instead of solving it.
Measure the available width, depth, and height before purchasing an organizer. Also consider nearby upper cabinets and make sure the organizer does not interfere with doors or reduce access to electrical outlets.
Use vertical storage for a clearly defined group of items rather than as an excuse to keep more objects on the counter.
Recommended Product: Under-Cabinet Rotating Utensil Hook Organizer
When counter space is limited, the unused area beneath a cabinet can sometimes provide practical storage for lightweight kitchen utensils. An under-cabinet hook organizer keeps frequently used tools within reach without requiring another countertop container.
The rotating design can also make individual utensils easier to access. Before installing one, check the available clearance beneath the cabinet and make sure hanging utensils will not interfere with your food-preparation area or nearby appliances.
Check the Under-Cabinet Rotating Utensil Hook Organizer on Amazon → (paid link)
Step 7: Contain Small Everyday Items
Several small objects spread across a counter can create more visual clutter than the same objects grouped within a defined area.
A small tray may work well for a few frequently used cooking items. A compact utensil holder can keep essential tools together. A suitable sink caddy can help prevent sponges and dishwashing supplies from spreading around the sink area.
Containment works best when the container itself has a clear purpose.
Avoid purchasing a large basket simply to hide miscellaneous items. If the contents do not belong together, the basket may become a clutter container that needs to be sorted later.
Choose the smallest organizer that comfortably accommodates the items you genuinely need in that location.
Recommended Product: ALELION Small Countertop Tray
Small everyday items can quickly make a kitchen counter look more cluttered than it actually is. A compact tray creates a defined place for a few frequently used items instead of allowing them to spread across the work surface.
The key is to keep the tray intentionally limited rather than turning it into another collection point for clutter. Choose only the items you regularly use and leave the rest inside cabinets or drawers.
Check the ALELION Small Countertop Tray on Amazon → (paid link)
Step 8: Make Better Use of Cabinets and Drawers
A crowded counter is sometimes a symptom of poorly organized storage elsewhere in the kitchen.
If cabinets contain large areas of unused vertical space, duplicate items, or things that are rarely used, there may be opportunities to relocate countertop items into them.
Our guide on how to organize kitchen cabinets in a small kitchen covers practical cabinet zones, vertical storage, and ways to make deep or awkward cabinets easier to use.
Drawers can also remove small tools from the counter when they are organized effectively. Everyday utensils do not necessarily need to live in a countertop holder if suitable drawer space is available.
Before buying another countertop organizer, check whether reorganizing an existing cabinet or drawer could solve the problem without consuming additional work surface.
Step 9: Pay Special Attention to the Sink Area
The area around the sink can become cluttered with dish soap, hand soap, brushes, sponges, cloths, drying items, and cleaning products.
Keep only the supplies that are genuinely useful at the sink. Backup bottles and less frequently used cleaning products may be better stored elsewhere when appropriate.
A compact sink caddy or tray can define a home for the items that remain, making them easier to move when the counter needs cleaning.
If the cabinet beneath your sink is difficult to use, our guide on how to organize under the kitchen sink in a small kitchen explains how to create practical storage zones around pipes and other obstacles.
Be cautious about storing inappropriate products close to food-preparation areas, and follow product-label instructions for storage and use.
Recommended Product: Cisily Kitchen Sink Caddy
Sponges, brushes, and dishwashing supplies can quickly create clutter around a small sink. A dedicated sink caddy keeps these everyday cleaning items together instead of allowing them to occupy different parts of the counter.
Keeping wet cleaning tools in a purpose-built organizer can also make the sink area easier to maintain. Before buying, check the available space beside your sink so the caddy does not reduce the working area you need for washing dishes or preparing food.
Check the Cisily Kitchen Sink Caddy on Amazon → (paid link)
Step 10: Leave Some Counter Space Intentionally Empty
Empty counter space is not wasted space.
It provides room for unpacking groceries, preparing meals, placing a hot or heavy item where appropriate, serving food, or temporarily using an appliance that normally lives elsewhere.
Leaving some areas open also makes counters easier to wipe down because fewer objects need to be moved during routine cleaning.
Rather than asking, “What organizer can fit here?” whenever you see an empty section, ask whether the kitchen works better when that section remains available.
In a small kitchen, flexibility can be more valuable than maximizing storage on every surface.
Best Organizers for a Small Kitchen Counter
The most useful countertop organizers are those that reduce the amount of space required by items that genuinely need to stay accessible. You do not need every organizer listed below.
Compact Turntables
A small turntable can improve access to bottles, jars, or other suitable items when reaching behind them is inconvenient.
Measure carefully before buying one and make sure it can rotate freely in the intended location.
Tiered Countertop Shelves
A tiered shelf can make use of vertical space for a limited group of frequently used items.
Choose a design that fits beneath upper cabinets and does not create an unstable stack of heavy objects.
Small Trays
A tray can visually and physically contain a small group of related items, such as frequently used cooking supplies.
Keep the tray appropriately sized so that it defines the zone rather than taking over the counter.
Utensil Holders
A countertop utensil holder can be useful when several cooking tools are used frequently and drawer space is limited.
Avoid filling it with every utensil you own. Keeping only frequently used tools accessible makes it easier to find what you need.
Sink Caddies
A compact caddy can organize dishwashing essentials near the sink and help prevent small items from spreading across the surrounding counter.
Choose one that suits the size of your sink area and can be cleaned easily.
Under-Cabinet Storage
Certain under-cabinet solutions may create storage without occupying the main work surface.
Before installing anything, check the dimensions, mounting requirements, weight limits, clearance, and whether it could interfere with normal countertop activities.
Common Mistakes When Organizing a Small Kitchen Counter
One common mistake is buying organizers before reducing the number of items on the counter. Adding shelves, baskets, and trays to an already crowded surface may organize the clutter without actually creating more working space.
Another mistake is keeping every appliance visible for convenience. Permanent counter space should generally be prioritized for appliances that are used often enough to justify the room they occupy.
Avoid creating too many decorative stations. Coffee stations, snack stations, beverage stations, baking stations, and other dedicated areas can be useful in larger kitchens, but multiple stations may consume too much space in a genuinely small kitchen.
Be careful about oversized organizers as well. An organizer may technically hold more items while occupying more counter space than the loose objects originally required.
Finally, do not assume that every empty section needs to be filled. A small amount of deliberately unused space can make the entire kitchen easier to work in.
How to Keep a Small Kitchen Counter Organized
Once you understand how to organize a small kitchen counter around the items you actually use, maintaining the space becomes much easier.
Return items to their designated locations after cooking, washing dishes, or bringing home groceries. If something repeatedly ends up on the counter, determine whether it needs a permanent home nearby or whether another storage area should be adjusted.
Periodically review appliances and other objects that remain on display. If something has not been used for several weeks or months, consider whether it still deserves permanent countertop space.
Also watch for gradual expansion. A tray designed for three everyday items can slowly become a collection point for unrelated objects. When a zone begins overflowing, reduce its contents instead of automatically replacing it with a larger organizer.
The most sustainable system is usually one that is simple enough to reset during normal kitchen cleanup.
Final Thoughts
Learning how to organize a small kitchen counter is not about removing every visible object. It is about deciding which items genuinely need immediate access while protecting enough open space for the kitchen to function properly.
Start by clearing the counter, protect your main preparation area, keep only frequently used appliances accessible, and group necessary items into compact zones. Use vertical storage and organizers selectively, and look inside cabinets and drawers before adding more storage to the countertop.
Most importantly, allow some space to remain empty. In a small kitchen, an open section of counter is not unfinished—it is useful space waiting for the next meal, grocery bag, or everyday task.
6 thoughts on “How to Organize a Small Kitchen Counter Without Clutter”
Comments are closed.